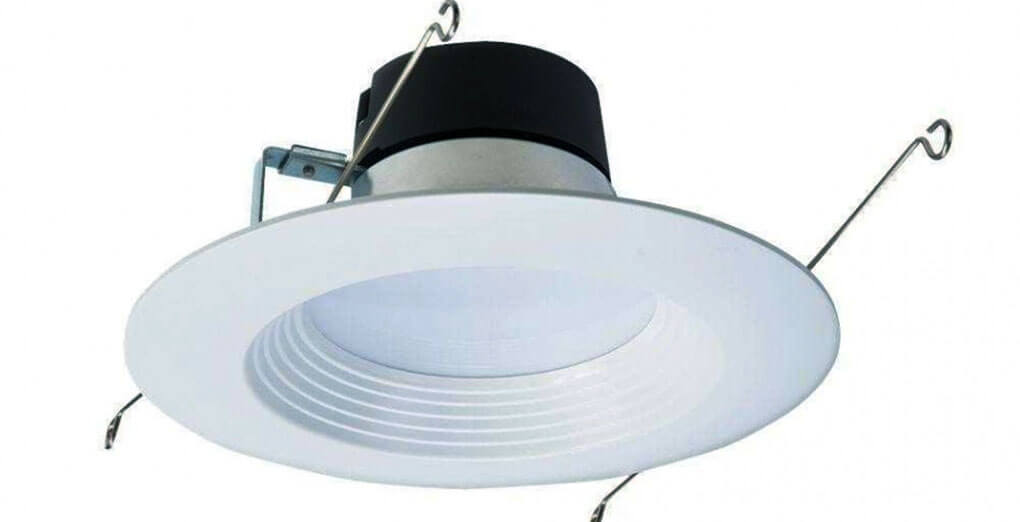
Recessed lights, also known as can lights will give any room an excellent and modern finish, besides giving you a reliable source of ample lighting. However, installing the lights can be very complicated if you do not have attic access above the room where you wish to install the lights.
In most instances, many people tend to seek professional help for this task which ends up very expensive. You will be particularly annoyed to know that labor forms a bulk of these expenses, yet you can get the job done by yourself.
Well, this article aims to educate you on how you can install these lights in any room without attic access.

Tools Needed to Install Recessed Lighting Without Attic Access
There are several materials that you will need to make your job easy and give you satisfactory results at the end of everything. Let us briefly mention them.
1. Recessed Light Housing
This should be retrofitted and should ideally measure more than four inches as this would make it usable daily.
2. Drill and Wood Boring Drill Bit
As part of the installation process, a time will come when you will need to bore holes through the ceiling joist, and this is where the drill and the drill bit will come in handy.
3. Recessed Lighting Trim
A reflector trim would give the light pattern a more focused feature, like a spotlight and also enhance the stylish and modern outlook.
4. Light Bulbs
When it comes to light bulbs, make a point of going through online reviews of various types before selecting which to use in your premises. Some of the factors that you should consider include energy consumption, heat, etc.
Ensure that the bulb fits well into the recessed light housing. It should also be dimmable to avoid lighting up your house excessively.
5. Wires and Wire Connectors
As you would have guessed, this process not only requires wires but lots of them. They should be thick and firm to ensure durability. They should also be flexible enough for you to get them to your preferred point.
The wire connectors will come in handy when you wish to join two copper wires or cables of different lengths. They will also help in connecting the wire or cable to an electrical terminal.
6. Drywall Screws/Panel
The drilling is going to leave a lot of holes in your ceiling, and these materials will help you repair and cover these holes and prevent your roof from becoming an eyesore.
7. Tape Measure/Ruler
This process will involve making a lot of cuttings, and you would not want any inaccuracy in this process. Therefore, these items will help you achieve your preferred accuracy.
8. Ladder
This will help you reach your ceiling safely, provided that it is always stable.
Other Materials That You May Need
There are other items that you may need for this process; some have to be there while others don’t. They include Gloves and Safety Glasses, Utility knives, Wire Cutters and Strippers, Knockdown texture Spray, Drywall Saw, and a Stud Finder.
Here is one of our review posts you may like: light for your study room
How to Install Recessed Lighting Without Attic Access in 4 Easy Steps
Step 1: Locating the Joists
The first step of this entire process is locating the joists as this will help you figure out where to place the lights and run the wiring. Get on the ladder and use a stud finder for scanning the joists.
Mark the locations and the direction that they run. We advise you to use a pencil for this marking as it will be easier to erase the scratches as compared to when you use a sharper object.
You should also determine the number of lights that you wish to install, and this will depend on the distance between each light.
Additionally
You should also figure out how to run the wiring that should power the lights. You will be at a great advantage if you already have a power source up there.
If the power source is not there, you will have to use a switch controlled source which will be a bit complicated to install.
Step 2: Cutting Holes In the Ceiling
We assume that you already have a plan which should be the basis upon which you will be installing the lights. Of course, you already figured out the number of lights you intend to install in the room.
Mark the locations of the lights in the ceiling and use a drywall saw to cut the holes. Start from the edges and slowly work your way to the precise location where you intend to install the recessed lights.
We advise that before you embark on the actual cutting process, use a coat hanger to survey the area where you are to install the lights, to be sure that there are no restrictive barriers up there.
Step 3: The Power Source
There are two ways of going about finding a power source for your recessed lights.
Use of an Existing Power Source in the Ceiling
If you already had a lighting fixture such as a fluorescent light fixture or a chandelier, remove it and use the existing wiring to power your lights.
Running Wires from a Switch Controlled Power Outlet
You can always tap into a switch-controlled power source and then run the wire through the wall up to the ceiling. Power will run from the switch via a red cable which you should connect to the black wire that will be running to the ceiling.
To pull the wire from the wall up to the ceiling, cut a small notch in the wall at the point where the wall joins the ceiling.
Step 4: Wiring and Installing the Lights
At this point, you will have to drill through the joints to run the wires to each light. Cut a hole next to each joist to make it possible for you to reach it with the drill. Keep the pieces that you cut out safe as you may need them for the patching process.
As soon as you finish the wiring, connect the wires to the lights and finally patch up the holes that you created on the wall and ceiling.
That’s it!
Also read: LED Light Fixture Not Working – Troubleshooting Common Problems
Conclusion
If you feel the slightest discomfort or confusion in this process, always consult a professional, or you may leave the entire task to them altogether. Be aware that expert services for such a job do not come cheap, and the cost will vary depending on the size of your room.
You will be pleased with the impressive look that these lights will give your room.

Here, I provide valuable insights into the lighting industry, drawing from 12 years of experience. My aim is to share useful and practical tips, life hacks, and comprehensive product reviews. I hope that collective expertise, advice, and recommendations prove beneficial to you.


