Over the past few years, LED lights have significantly grown in popularity, and it is easy to see why this is so. They are versatile, stylish, and cost-effective in terms of their energy consumption. With these lights, your kitchen, office or any other space does not have to look dull with ordinary lighting.
It is impressive that you do not need any electrical knowledge to get the job done when it comes to their installation. All you need to do is plan appropriately and follow all the necessary steps for the fixing.
Keep on reading this piece as we have provided you with a simple step-by-step guide on fixing the LED lights to your ceiling.

The Pre-Planning Phase
Before you embark on the installation, there are several things that you need to take care of. They are as follows:
Measure the Area Where you Intend to Stick the LEDs
Here, you’ll need to determine the number of LED units to provide you with the lighting that you need. If you intend to install the LED lightings in different locations, measure each spot to allow you to cut the light to its appropriate size later on.
After getting the individual measurements, add them together to get the approximate length of LED lighting that you’ll need to buy.
You should also sketch the area where you intend to install and note where you’ll be placing the lights and the closest outlets for connection.
Read our another on buying guide for mood lighting for bedroom
Plan The Route
Planning the route of your LED involves finding out where it will plug into a power outlet or connect to a power supply. Use a tape measure to determine the length of the lights needed to cover the entire area.
And in case of tight corners or odd spots, consider buying power cords to fill the remaining gap.
Confirm your Ceiling Type
You should consider yourself lucky if you have a flat and smooth ceiling since the built-in adhesive in the back will make everything easy for you. However, a rough-textured ceiling will require you to get creative and find alternative ways of sticking the LED.
Some of these alternatives include:
- An extra-strong double-sided tape
- LED mounting channel
- LED strip mounting clips
Installing the LED to the Ceiling
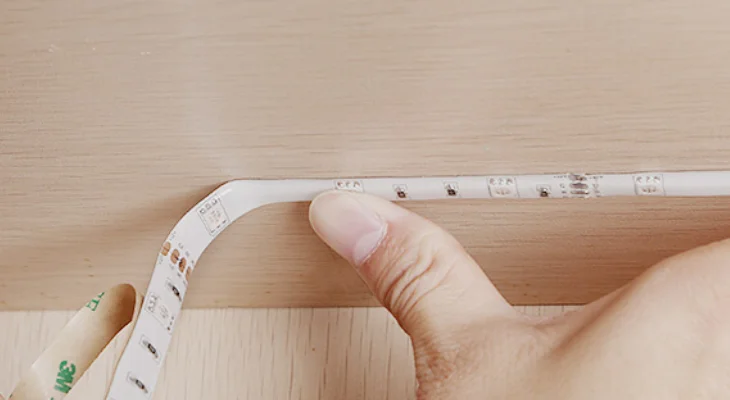
If your ceiling is the flat type, use the adhesive strip on the LED’s back while you can use the alternative methods we have provided for the rough ceilings. The good thing about these other methods (mounting channels and clips) is that they come with their set of instructions. So, the installation process should be relatively easy.
Back to the strips, use a pair of scissors to cut through the black line in the middle of the copper solder pads.
Use strip connectors to join the separate pieces while ensuring that they are compatible with the LEDs in different aspects. These include the width, types of pins and maximum wattage.
Connect the LED Lighting to a Power Source
The final step involves connecting your LEDs to the power and turning them on. Note that you have the option of using the LED’s extra length to connect to the power or an extension cord if needed.
And with that, your office or kitchen is ready to be lit up with the LED light that you have installed on your ceiling.
You may love to read: Best Light Bulb Changer High Ceilings and Top 5 Best 48 Inch Light Bar
Final Word
See? Attaching LED lights to your ceiling is not as complicated as you may have imagined. Just follow the steps we have provided, and you’ll be on your way to enjoying the benefits that these types of lights bring.
However, if it is your first time making such electric connections, it would be wise to consult an electrician before embarking on any installation. This will ensure that you do the process safely and correctly.

Here, I provide valuable insights into the lighting industry, drawing from 12 years of experience. My aim is to share useful and practical tips, life hacks, and comprehensive product reviews. I hope that collective expertise, advice, and recommendations prove beneficial to you.


