LED Light Fixture Not Working? Don’t worry you’re in the right place. In this post, I’ll cover all the possible causes and fixes for an LED fixture that is not working.
Most light fixtures are well-made and, therefore, tend to last for many years. In fact, many of them can run maintenance-free save for the need to change burned-out bulbs. However, nothing is impossible in this world and sometimes, even the best-made fixtures may develop problems.
There are quite a few things that can go wrong with LED light fixtures in particular (more on those later). Fortunately, in most cases, the repairs needed are quite basic. For instance, they may involve a simple tweak of the socket or just a replacement of the light bulb.
In worse-off cases, the repair task can be quite complicated. For instance, it may involve the need to replace an entire wall switch or even an entire overhaul of the light fixture. So, what’s the best way forward?
Table of Contents
- How to Diagnose Common LED Light Fixture Problems
- Minor Issues of Why LED Light Fixture Not Working
- LED light not working but has power
- FAQs on Why LED Not Working
- Final Thoughts
The first best step to take at all times is to diagnose the problem. Before you start finding the reasons why your LED light fixture not working, you need to have an idea about the most common reasons.
The common reasons are:
- Fluctuations in power.
- The electrical installation is not up to code.
- Manufacturing defects.
- Dimmer is not compatible with your LED light.
- The transformer is not suitable for low-voltage lamps.
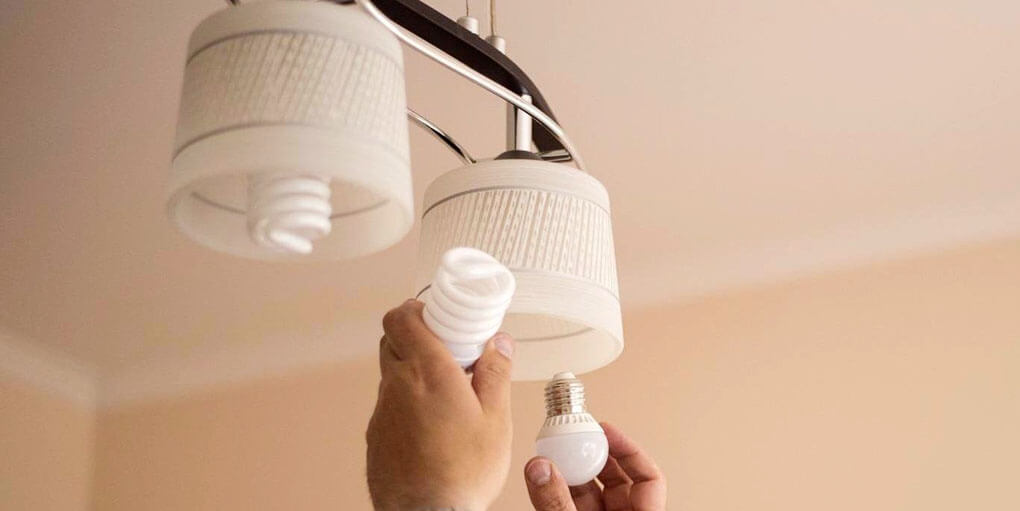
How to Diagnose Common LED Light Fixture Problems
In 99% of the cases, problems with light fixtures emanate from interruptions in the flow of power. Such problems can either be at the wall socket end, within the light fixture or at the bulb end of it.
Usually, you can tell that the problem is with the bulb especially if the bulb flickers intermittently. Otherwise, if the light bulb isn’t lighting up completely, the best possible approach is to check if it is burned out. If that’s the case, you can go ahead and replace it.
Electrical wiring and setup carry a risk of fire, electrocution and serious injury. It is dangerous to work on the electrical system; it is best to leave it to a professional.
Further Minor Checks
In some cases, the fixture may fail to perform as expected due to a loosely fitted bulb. In that case, your best bet is to check and see if the bulb fits tightly into its socket. Sometimes, the bulbs may weaken on their own and in that case, all you need to do is screw in the bulb tighter.
Time to Check the Socket
What if the problem is with the socket and not the bulb? Well, in that case, the best approach is to check the socket tab which is usually located at the bottom center end of the socket. If you notice that it has become flattened, all you may need to do is to bend it back up, gently.
Such a minor tweak can help restore the contacts with the bulb. At this point, it’s important that we emphasize on safety. Before you attend to any electrical appliance, it’s always important that you shut off the power.
Check the Wire Connections
With the power off, the next best step is to check the wire connections of the light fixture. If you have the knowledge of an electrician, you can simply open the entire unit to check if there are any disconnected wires or something.
It’s one thing to check. But unless you are a qualified technician or know what you are doing, be keen not to tamper with the connections. Doing so can lead to even more complications with light fixtures.
Using an Electric Multimeter to Check for Short Circuiting
The job of a multi-meter is to check for power continuity. In this case, you want to confirm that the transfer of electric charge from one end to another takes place successfully. If this continuity lacks, there exists something known as a short.
In simple terms, an electric short is a sign that the electrical system of your light fixture isn’t functioning properly. By checking this continuity, you can easily diagnose the problem without having to dismantle the entire structure.
How to Check for Short Circuiting Using an Electric Multimeter?
The first step is to turn the multimeter’s settings using the knob. All you want to do is be on the lookout for unequal measurements appearing on the multimeter. That way, you can diagnose a short and probably get the malfunctioning wire replaced accordingly.
Once again, we’d advocate for safety for anyone thinking of taking this route. And if you’re not sure what you’re doing, be sure to consult an electric technician.
Minor Issues of Why LED Light Fixture Not Working
If the wiring doesn’t seem to be the issue, the next best course of action is to narrow down to other potential issues. In some cases, you might come to realize that incompatible switches are to blame for the LED light fixture not working.
Please note that most new model LED lamps are incompatible with switches from the yesteryears. Still, if that’s not the issue, there are quite a few minor issues you may need to double-check on and they are as follows.
Driver Components
When your LED lights start to flicker, chances are that this is due to problems related to the driver components. Please note that modern LED lights come with advanced driver components which are less likely to flicker. That, however, doesn’t mean that they are infallible.
Have an electrician check these ones for you. And if the driver components are diagnosed to be the issue, be sure to have them replaced with constant-current drivers. This helps even out any peaks in the current wave and by default that can eliminate the flickering.
Capacitor & Relaxation Oscillator
Some cheap fixture components e.g. capacitors might come with low-rated lives. As such, they might easily break down. In particular, capacitors do the job of regulating the current supplied to the LED via a driver module.
Another common component that might cause issues is the relaxation oscillator. This is the component that’s responsible for having the capacitors inside the LED lamp to flip in on-and-off cycles. The off cycle is when the lamp is turned off to create a charging cycle.
When the relaxation oscillator malfunctions, it causes temporary illumination thereby leading to flickers. In that case, it’s best to have this entire component replaced.
Incorrect Wattage
When you first install the light fixture, it tends to draw more power than if it had been plugged in and running for some time.
Now, this sudden demand for extra power can cause your LED lights to flicker due to the drop in power. In that case, the best solution is to move your fixture to a high-volt circuit.
Also read: How to Determine Wattage of Light Fixture At Home
LED light not working but has power
If your LED light isn’t working even though it has power, there are a few possible explanations. It could be a problem with the LED light itself, the power supply, or the wiring.
First, check to make sure that the light is getting power. If the LED light is getting power, then the next thing to check is the connection between the light and the power source. If the connection is good, then the next thing to check is the LED itself. If the LED is damaged, then it will need to be replaced.
FAQs on Why LED Not Working
Yes, LED light fixtures can be repaired. However, it is often more cost-effective to simply replace the fixture. If the LED fixture is still under warranty, the manufacturer may cover the cost of replacement.
An LED bulb usually has a lifespan of around 25,000 hours, so it is not common for them to go bad. However, if an LED bulb does go bad, it will usually just stop working and will not emit any light.
You need to contact your LED light support/service center/sell point to replace it if there is any warranty with it.
If the LED light doesn’t light up, it could be a faulty LED board, a poor connection to your motherboard, a faulty driver, or a damaged one. First, make sure it meets the specifications. LED’s generally come with a warranty. If the LED does not turn on, contact customer service for a replacement.
To check for an LED light that is not working, 1st make sure that all the LEDs are connected properly. Also, check to make sure that all four wires are plugged into their respective terminals. If the LED light is still not working, it is probably burnt out. If the power board has burned out, the bulb on the power board will light up.
Although LED fixtures last longer than incandescent bulbs, they are still considered consumables. LEDs can last anywhere from 25,000 to 50,000 hours, depending on their color, lumen output, and operating temperature.
Yes, but just because an LED bulb will fit does not mean it will work. Some fixtures are designed to accept incandescent bulbs only.
Final Thoughts
As we have explained, there are quite a few problems that might affect your LED lights. The best way forward in such cases is to troubleshoot the issues and that is best done through a step-by-step process.
We hope that the suggestions above will help you arrive at that verdict in an informative manner.

Here, I provide valuable insights into the lighting industry, drawing from 12 years of experience. My aim is to share useful and practical tips, life hacks, and comprehensive product reviews. I hope that collective expertise, advice, and recommendations prove beneficial to you.

I currently have a 22,000 high bay ( LED )light that only half of it is lit. Would it be possible to purchase a new ballast for the half not working.
I currently have a 22,000 LED High Bay light that only half of is working. Would it be possible to purchase a new ballast for the non-working half? These are awesome lights and I would like to fix it. I purchased it from Rural King, but it has been over 30 days and they won’t exchange it. THANK YOU !