Many homes, businesses, and vehicle owners have chosen LED lights over normal incandescent bulbs in recent times. This is mainly due to their low power consumption, which leads to lower power bills to help you save some money.
If you plan to install LED units by yourself, it is vital that you understand everything concerning the led light bar wiring. Believe it or not, this area is frowned upon by many people due to the belief that it is complicated.
Luckily for you, we are here to end that mystery. In this article, we shall tell you all you need to know about an LED light bar’s wiring and the purpose that the different wires serve.
Basics About the LED Light Bar Wiring
The first thing you need to know is that LED light bars are wired differently depending on their function. Let’s break them down for you:
One Wire LED Light Bar
These types of bars are single-function lights and ground (-) through the housing’s bottom. In this instance, the one wire, which could either be white, black, or red, will act as the positive (+) function wire.
Two Wired LED Light Bar
Next up are two-wired lightings which are also single-function units. In most cases, the wires are black and white, where the former will normally be positive while the latter will be the ground (-).
3 Wire LED Light Bar – What Wire Does What?
This type of lighting is the focus of our discussion and is a multi-function light. The three wires featured here are white, black, and red, all of which have different purposes. Here, red is positive, black is the second positive, and white is ground.
The main advantage of the three-wired unit is that you can use it in the application that you feel is most suited for you. For instance, you could use it for brake and blinker or running and brake, whichever suits you best.
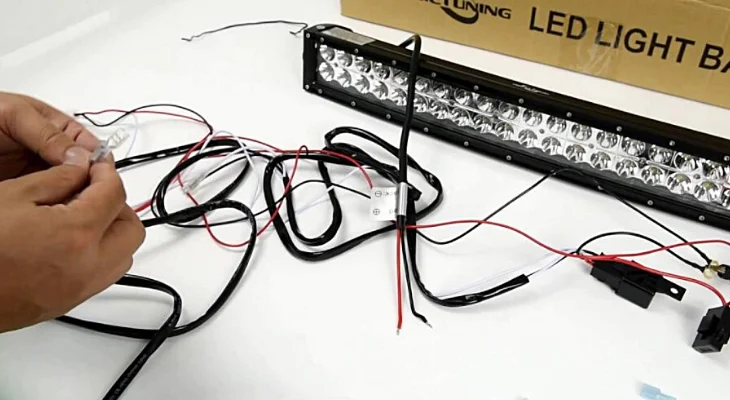
Illustration
Let’s give you a brief illustration of how you can do the wiring on a 3-wired LED light bar. If you choose to install the light as a brake and blinker, here is how you should make the connection.
Start by connecting the light’s black wire to the car’s positive brake light wire and then connect the LED’s red wire to the vehicle’s positive blinker wire originating from the flasher relay.
NB: It is important we point out that when it comes to the aftermarket LED lights, no particular pattern is followed when it comes to the wiring. So, when you come across a white, blue, and black wires light bar, do not be surprised as the wiring principles are basically the same.
How to Tell Positive and Negative Wires
Not all of us are experts in differentiating positive from negative wires in a three-wire assembly. Luckily, there is a simple way to do it, and it involves using a 9v battery to test for the LED lights’ polarity.
Start by pressing the wire you suspect to be negative against the battery’s negative side (which you obviously know). At the same time, hold one of the two remaining wires against the 9V battery’s positive side.
If you mess up and end up pressing the two positives to the 9V battery, i.e., LED’s positive to the battery’s positive and the LED’s positive to the battery’s negative, you should not expect any damage to happen.
Wiring The Battery
At this point, you must have determined the voltage required for the light bar to function effectively. Now comes the often tricky part of wiring your battery which you’ll have to do with a soldering gun.
If you aren’t sure what soldering entails, you could always refer to the various videos online showing you how to do so. However, we believe the procedure is quite simple, whereby you’re heating up material so that it covers a particular area.
And once the material dries up, the two surfaces will have permanently bonded.
Even though there are simpler methods of completing the connection without involving soldering, we found it convenient and efficient in such a small-scale operation.
Away from that, if you got the voltage right and the on-off switch is in place, nothing should stop the current from flowing, and your LED light bar should not have any problem lighting up. This setup that we have provided is pretty basic, and if you are comfortable with something more complex, go ahead and do so as the options are plenty.
You can read another related post: How to Stick LED Lights to Ceiling
Closing Remark
Wiring a light bar may not be your cup of tea, but you do not have to leave the situation as it is. We have provided you with a simple guide that you can follow and ensure that three-wired assemblies are not as mysterious as they had been.
To avoid issues such as short circuits, it would be wise if you refer to a 3-wire LED light bar wiring diagram to help you get everything right.

Here, I provide valuable insights into the lighting industry, drawing from 12 years of experience. My aim is to share useful and practical tips, life hacks, and comprehensive product reviews. I hope that collective expertise, advice, and recommendations prove beneficial to you.